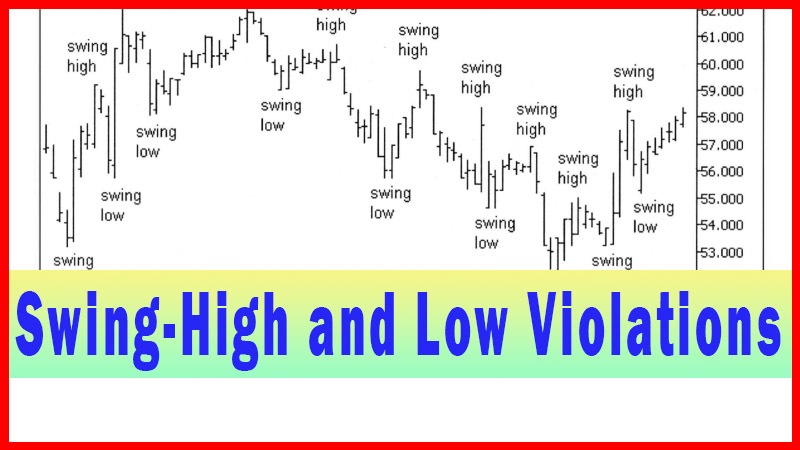
Overview of Entry Technique
Pullback trading, Trading plan, How to entry trade
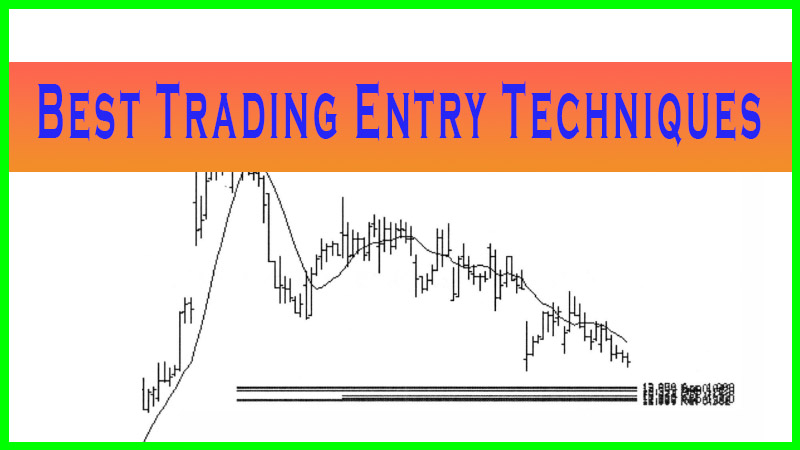
Course: [ Best Trading Entry Techniques : Trade Entry Techniques ]

The techniques may have some value, in many applications, outside the context in which I use them. I have found them to be of value, to me, in the context of my own trading plan.
Entry Technique Overview
Before I proceed
ahead and start presenting specific entry techniques, I want to delve into the
concept of ‘context’ a little bit. What do I mean by ‘context’? If a ‘Plan for
a Trade’ has four sections, as described in the introduction, then any look at a
section by itself, or a part of a section, has very little meaning outside of
the context of the entire ‘Plan for a Trade’. The entry techniques I will
present should only be viewed, and used, in the context of a well thought out,
complete trading plan.
This means that
an entry technique is to be viewed as a choice you make, to fulfill section two
of your own personal ‘Plan for a Trade’. The ‘trigger’ of a specific entry
technique is next to valueless if it occurs outside of a ‘potential trade area’
(an area that satisfies your section one criteria). Why is that? Simple. The
potential trade area is that area where you have determined you have a possible
edge, hence the desire to trade in that area. If the area didn’t appear to give
you an edge, you wouldn’t consider a trade there, i.e. it wouldn’t meet your
section one criteria as a potential trade area.
It follows that
the entry technique will also factor into your calculations on potential
capital at risk, as discussed in the introduction. Now you can simply adjust
your shares or contracts traded to not exceed your total capital at risk limit,
as outlined in section three, trade size determination. This, of course,
doesn’t address the reward to risk ratio or other factors that are laid out in
the larger scope ‘Trading Plan’. I won’t go into details in this work on the
capital at risk aspects of the ‘Trading Plan’, but it should be obvious that
the entry technique is directly involved with the amount of capital at risk.
Again, both have little meaning without the context of the other.
Finally, the
entry technique gets you into a trade, and then trade management (section four)
takes over. But entry point(s) will play into calculations you may do to
determine exit points and trade management. Your management plan is not set in
stone, devoid of the context of where you entered the trade, and why. The stops
you choose, and how you move them, will be decided based on all three other
areas of the trading plan.
This is pretty
easy to see from a common sense standpoint. Good choices on what you do as a
trade unfolds will surely take into account why you chose the area for the
trade in the first place (section one). It would surely take into account how
much capital you are willing to risk. And it’s obvious where you initiated the
trade factors into anything you would do during your management phase. All of
these sections form a web, with each section intricately involved with all the
others.
Why go into all
this detail explaining this? First, I think the importance of having a complete
trading plan, a plan where the relationship between the individual pieces is
clear, can’t be overstated. Second, I’m presenting just a piece of the whole in
this work, and I want it to be crystal clear that this is not to be viewed as a
stand-alone technique. The entry techniques have little value outside of the
context of a complete plan, and this can’t be overstated. Finally, the
techniques themselves are a part of my trading plan. I want to give the reader
a glimpse, at least, into the context in which I use the techniques.
The techniques may have some value, in many applications, outside the context in which I use them. I have found them to be of value, to me, in the context of my own trading plan. This is why I encourage the reader to experiment with the techniques and see, without risking any real capital, if they appear to be of some help. Test them extensively, and reject what you don’t like.
A significant part of my
trading plan revolves around attempts to get on board existing trends. (The
main process by which I do this is outlined in my Article Fibonacci Concept
trading) The trends may be on essentially any timeframe. I use three timeframes
to manage a trade. I choose a timeframe on which I will trade, one that shows
me a trend that looks good to me on that timeframe. I then look at a higher
timeframe (usually three to five times as high) for context, to see how this
trend fits in the bigger picture. I frequently look at even higher timeframes
to get even more context.
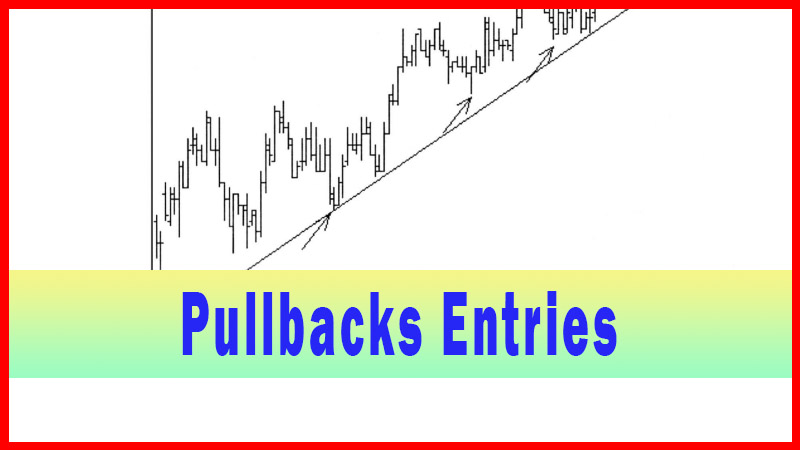
Once I decide I
like the trend and I want to attempt a trade, I look for a pullback. Once the
pullback is in progress, I drop down to a lower timeframe (usually three to
five times lower) and decide on an entry signal. This entry signal is what
actually triggers me into the trade. It’s this entry signal that we will delve
into in this work. The entry signals I will present here are signals I use to
attempt to board an existing trend on a pullback, where the pullback is viewed
in a lower timeframe.
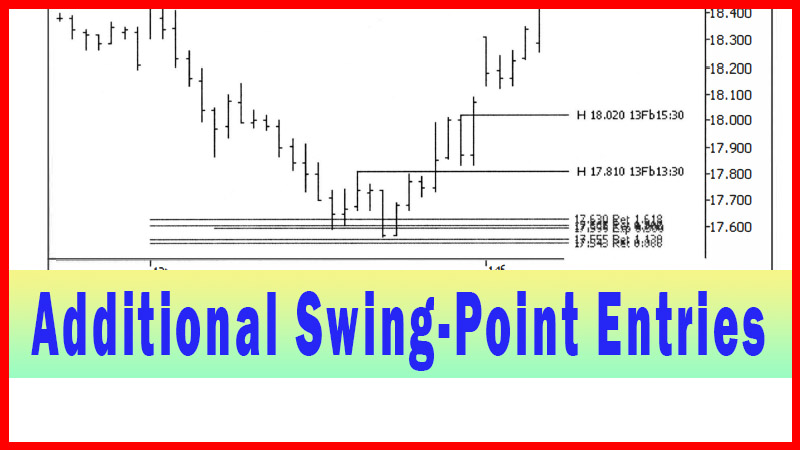
These signals may
have some use in attempting to enter many other different types of trades (such
as a channeling issue or a reversal trade entry off of a pattern). My use of
the signals is mostly limited to the above ‘pullback in a trend’ context,
although I have had some positive results in other contexts. I just want to
point out how I usually use the signals. It’s up to you, as the reader, to test
the signals for yourself, in the context of your trading style and trading
plan, and make your own decision if they are of any use to you.
Best Trading Entry Techniques : Trade Entry Techniques : Tag: Trade Entry Techniques, Forex : Pullback trading, Trading plan, How to entry trade - Overview of Entry Technique