Supply and Demand Fresh Zones
Fresh supply zone, Fresh demand Zone, How to find the supply and demand zone, market imbalance
Course: [ Easy Way To Learn Supply & Demand Trading Strategy : Supply and Demand Trading Strategy ]
A fresh zone is a supply or demand zone that price has not been tested yet. The first retracement tends to be the strongest and most reliable one to trade. We should always choose fresh untested zones to stack the odds in your favor.
Odd Enhancer 3: Fresh Zones
A fresh
zone is a supply or demand zone the price has not been tested yet. The first
retracement tends to be the strongest and most reliable one to trade. We should
always choose fresh untested zones to stack the odds in your favor.
After a
second retracement to the zone, it is better not to consider it because there
might not be enough supply or demand to move prices.
If the price
revisits a supply or demand zone but barely touches it, this is a very good
zone and we could expect the price to come back to test it again.
As a rule
of thumb, once the price penetrates 50% or more into the zone, you should ignore
the zone and start looking for a new fresh zone to trade.
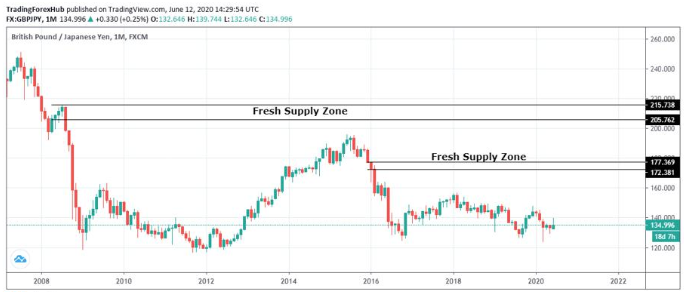
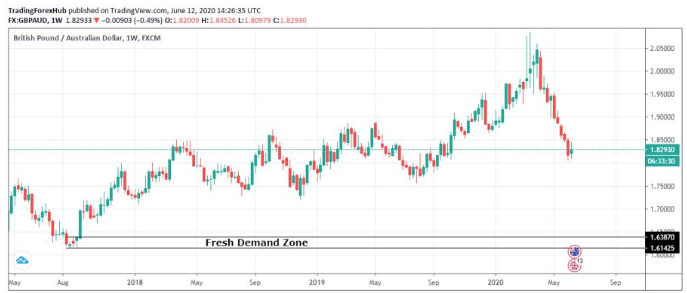
On the
chart below, we have two fresh supply zones that price has not been tested yet.
These are good zones to short once the price retraces back to either one.
The same
thing for the fresh demand zone below, if the price returns to test it we go
long.
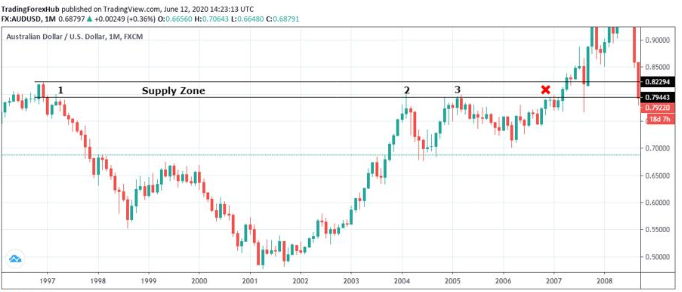
In the
first retracement, the price tested the supply zone and moved down, the same
thing happened in the second and third retracements. After the 3rd retracement,
the price broke above the supply zone as no more supply was found there.
Notice
how the price left the supply zone after the second and the third retracement.
The strength of these last two moves is weakening.
This
signals a potential shift in the market imbalance as more buyers are stepping
in creating a breakout above this supply zone.
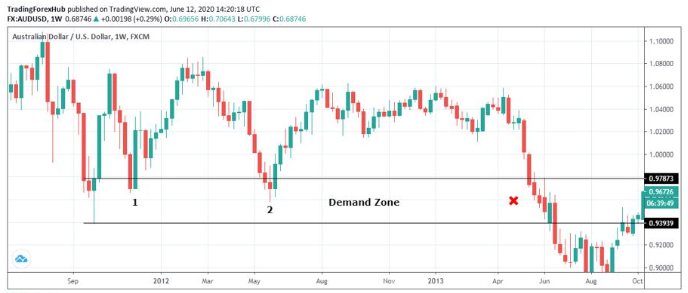
In this
example, the price broke the demand zone after the second retracement. Notice
that price penetrates deeper inside the demand zone with each retracement. This
is a good signal that the demand zone is no more valid and a potential
breakthrough is expected.
After the
second retracement, the demand zone is no longer valid as the market imbalance
shifts from demand to supply.
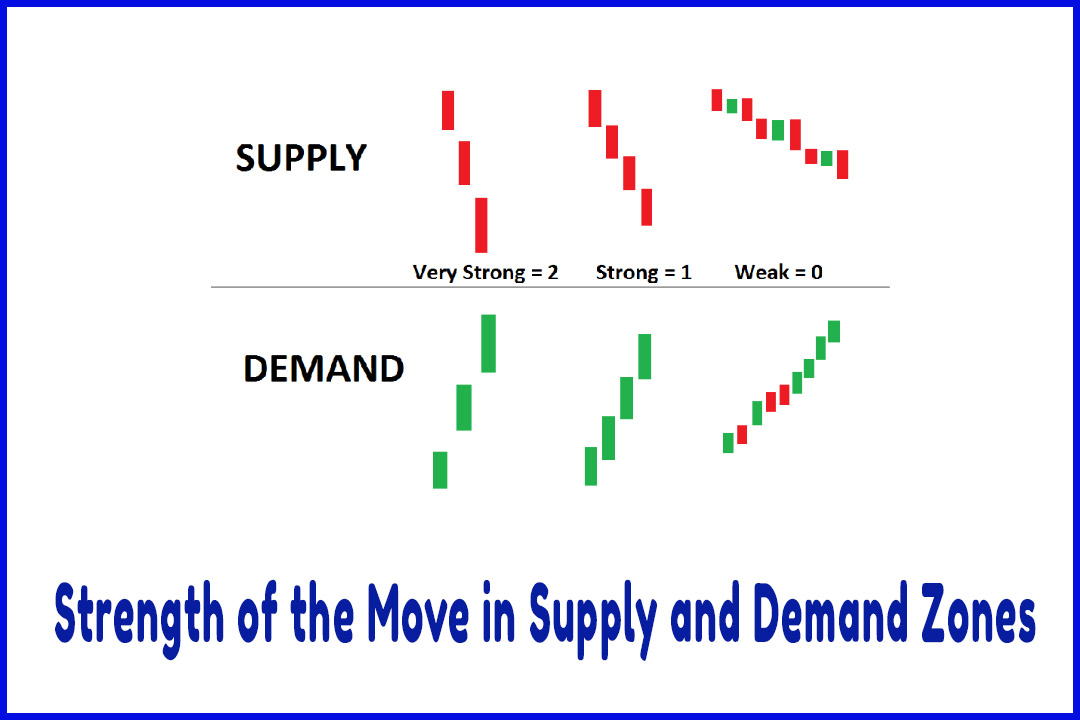
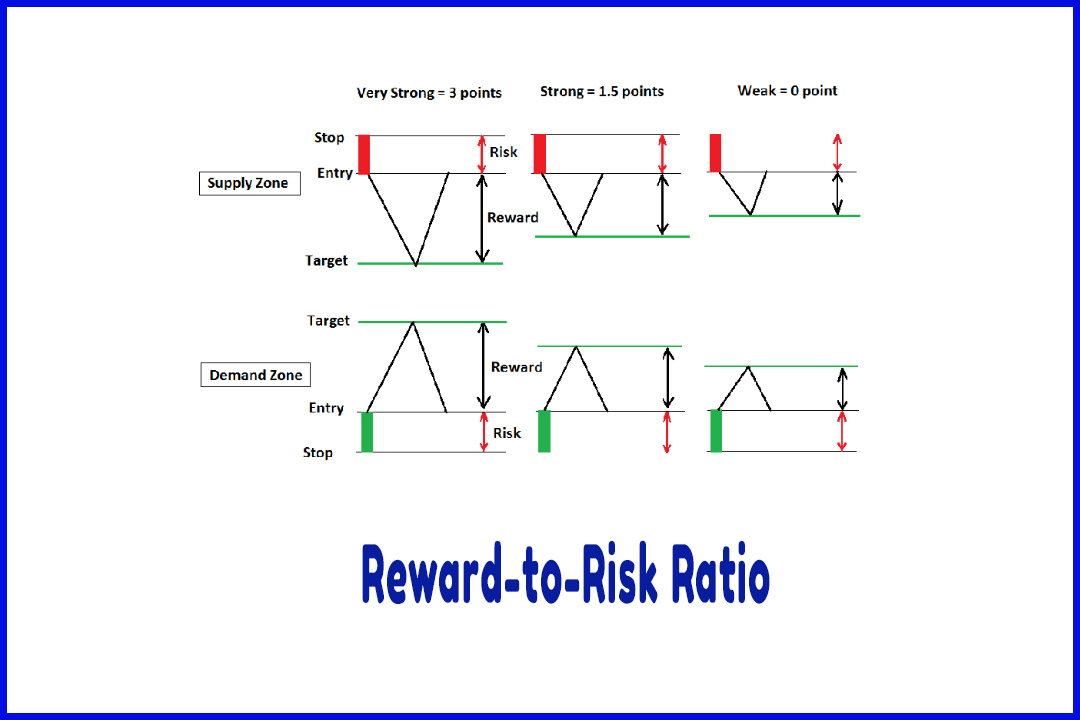
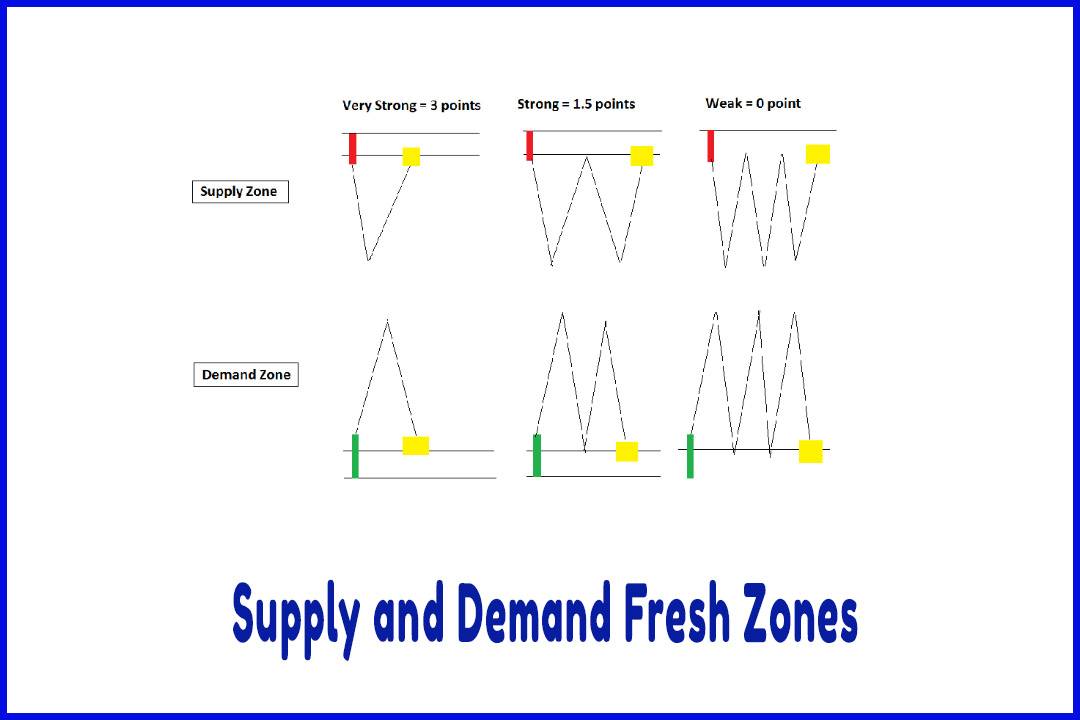
Using
this odd enhancer, we can give a maximum score of 3 points.
A fresh
zone that has not been tested has a score of 3 points. This is the one we need
to focus on when trading supply and demand in the forex. We need to stack the
odds in our favor by choosing fresh untested zones to trade.
If the
price retraces back to our zone for the first time, we give it a score of 1.5
points. We can still consider this zone but again we are looking for high-probability trading zones.
If the
price retraces back again for the second time, we give it a score of zero as it
has less probability of success.
At this
point, most of the unfilled orders are gone and the price might just pierce the
zone and move away to find another supply or demand zone.
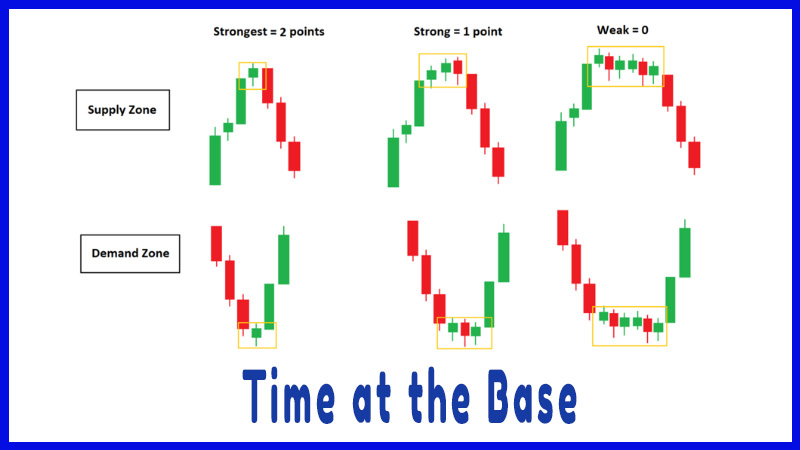
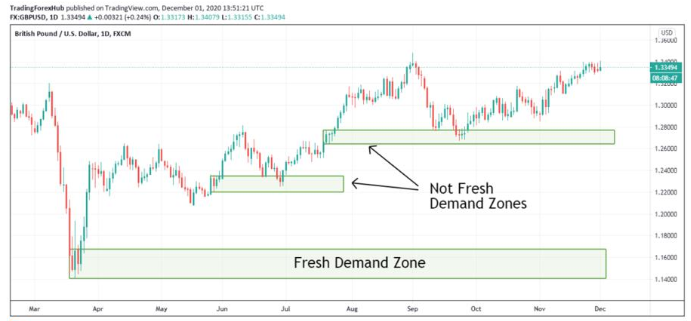
Here we
have a price chart with a fresh non-tested demand zone at the bottom of the
chart and two non-fresh demand zones at the top.
The score
for the fresh zone is 3 points, whereas the two top non-fresh zones have a
score of zero because the price retraced twice to the zones.
Easy Way To Learn Supply & Demand Trading Strategy : Supply and Demand Trading Strategy : Tag: Supply and Demand Trading, Forex : Fresh supply zone, Fresh demand Zone, How to find the supply and demand zone, market imbalance - Supply and Demand Fresh Zones