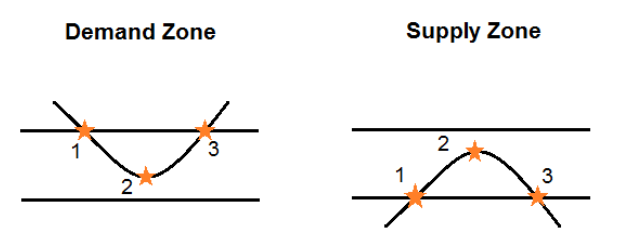
Supply and Demand Entry & Exit Strategies
Trade Exit Strategies, Confirmation Order, Market Order, Limit Order, Entry Strategies
Course: [ Easy Way To Learn Supply & Demand Trading Strategy : Supply and Demand Trading Strategy ]
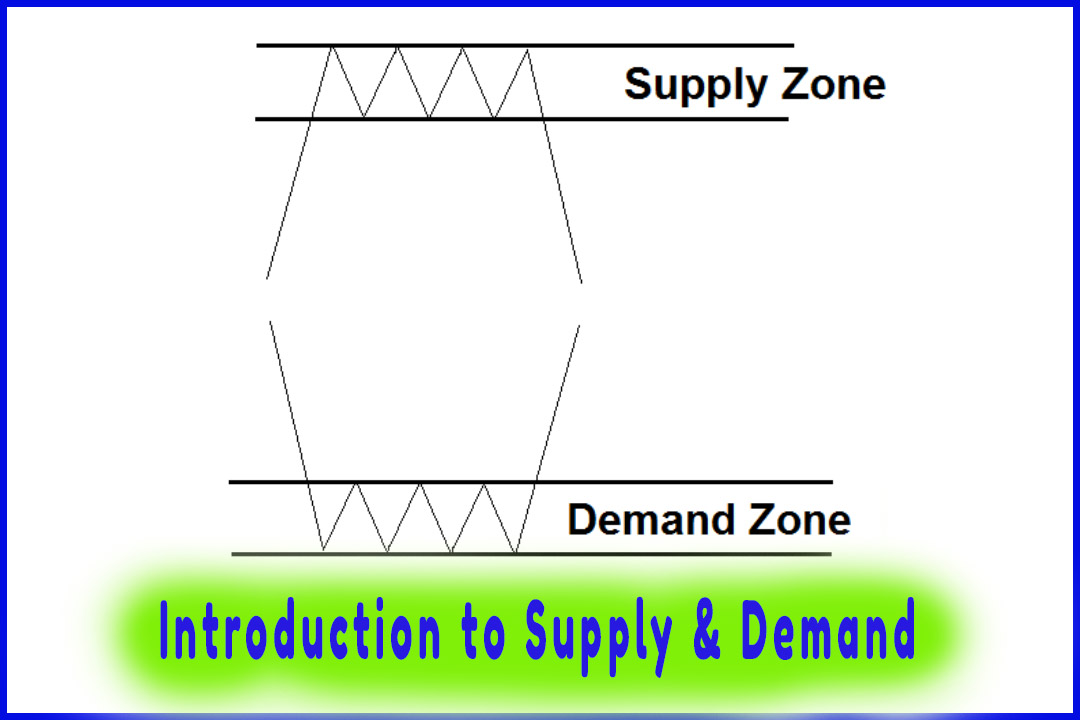
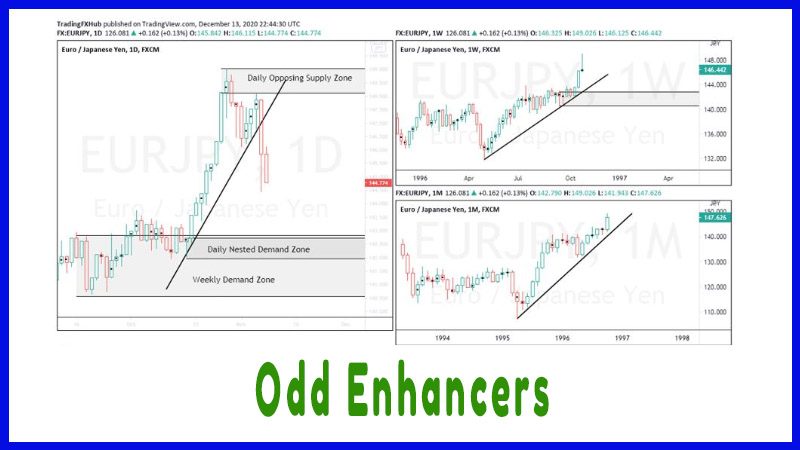
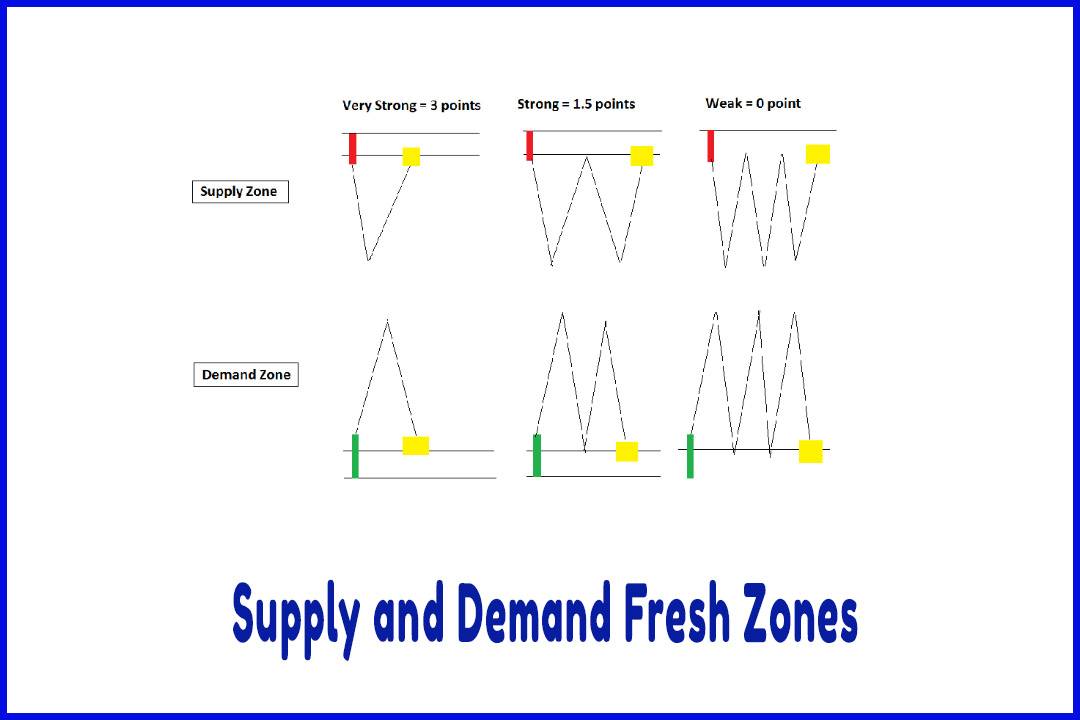
In the previous chapter, we discussed the main odd enhancers that we use to filter out supply and demand zones. Because supply and demand zones don’t work all the time, we need a system to let you filter out the good zones from the bad ones.
Entry & Exit Strategies
In the
previous chapter, we discussed the main odd enhancers that we use to filter out
supply and demand zones. Because supply and demand zones don’t work all the
time, we need a system to let you filter out the good zones from the bad ones.
Remember
that these odd enhancers don’t guarantee the success of the trade. Instead,
they give us a better chance of making the right trades when they show up and
leaving the ones that have a low probability of success.
Ideally,
we are only interested in supply and demand zones with a final score of above 8
points.
Note:
If two
levels or zones have the same score, then the zone which is closest to your
higher time frame is the one that takes priority.
Entry Strategies
There are
three types of entries: limit orders, market orders, and confirmation orders.
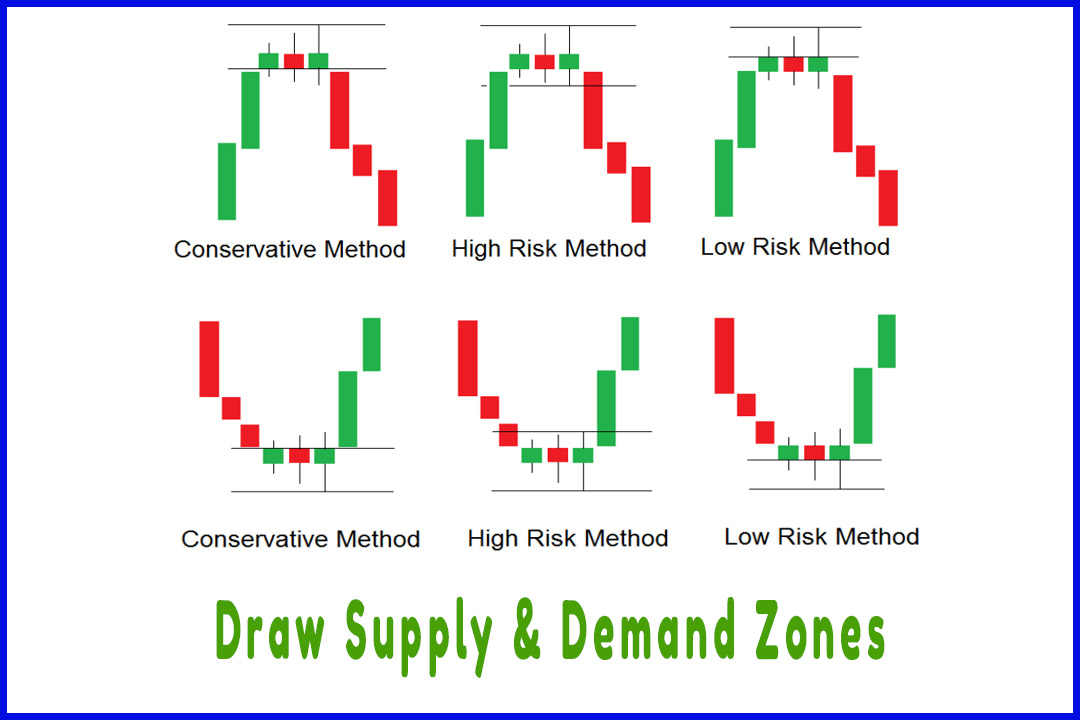
1. Limit Order
A limit
order is used to trade supply and demand zones with a score of 10 points. We
place a limit order at the proximal line with a stop loss a few pips away from
the distal line.
2. Market Order
A market
order is used to trade supply and demand zones with a score between 8 and 9
points. We place a market order when the price is anywhere inside the zone.
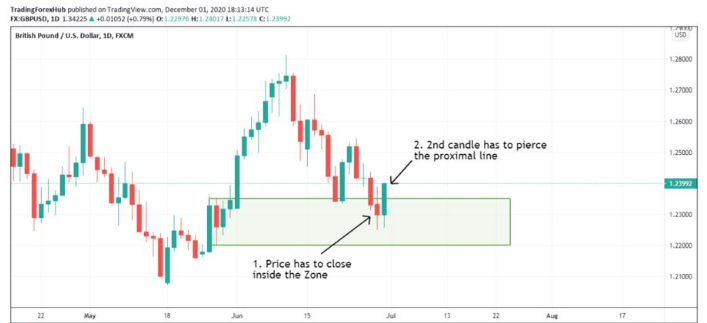
3. Confirmation Order
A
confirmation order is used to trade supply and demand zones with a score
between 8 and 9 points.
When the
price dips into the zone first (in 1) and crosses above (for demand zone) or
below (for supply zone) the proximal line (in 2). The moment it pierces the
entry line, you open a market order (in 3):
Examples
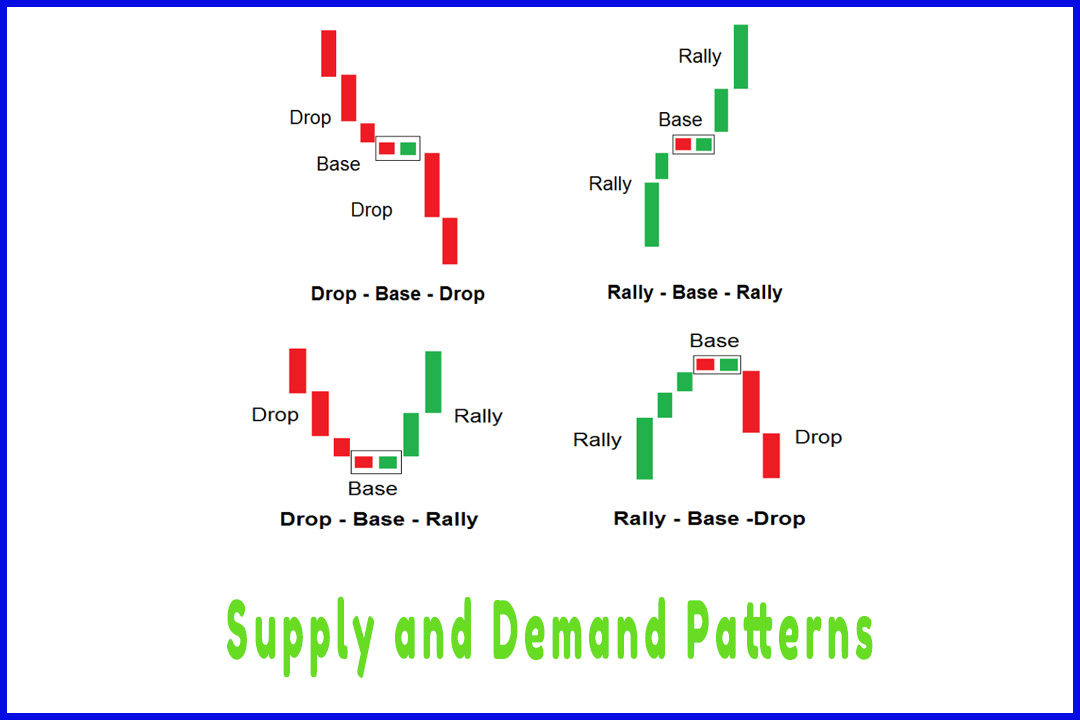
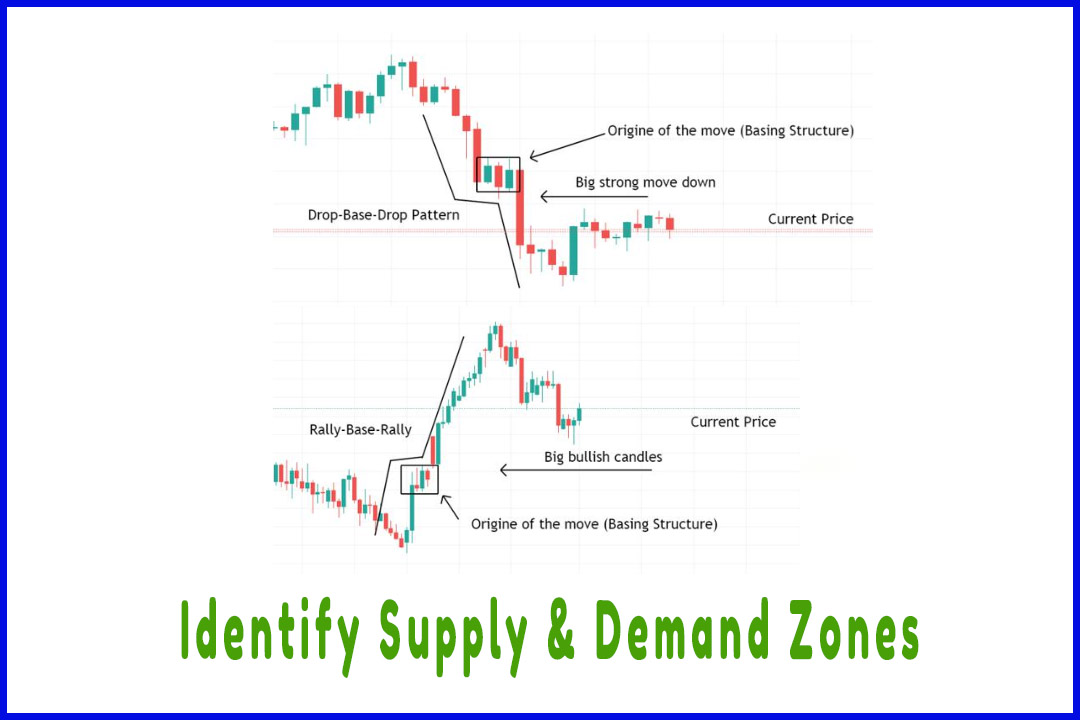
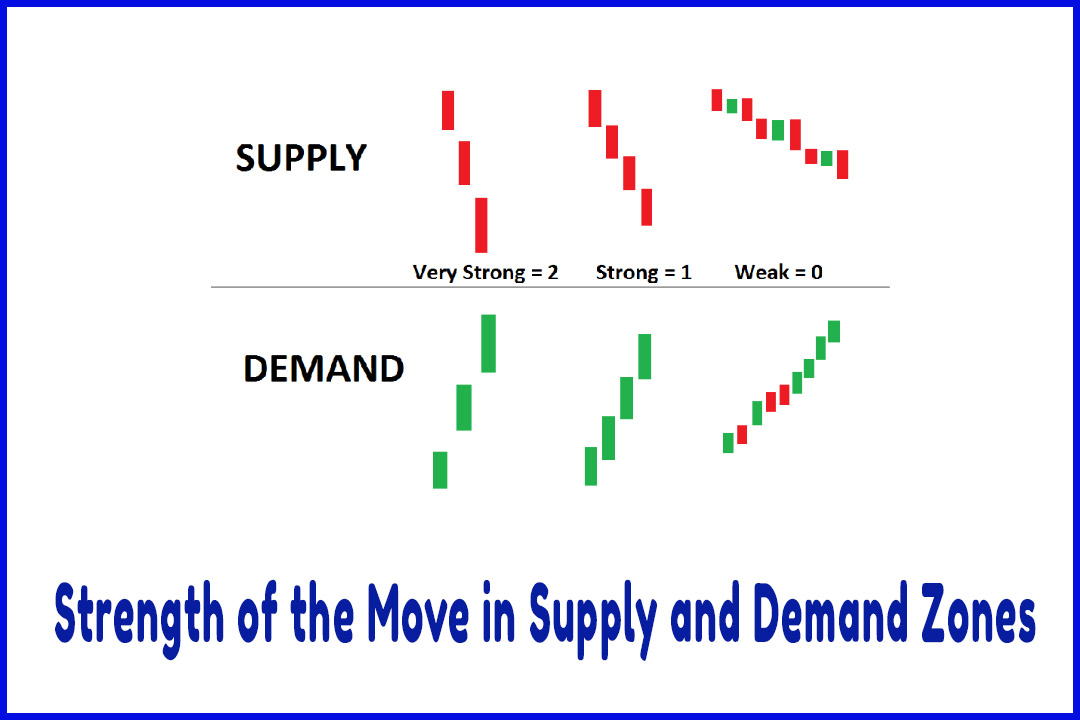
The first
example shows a supply zone with a score of 10 points. The strength of the move
is strong giving us 2 points.
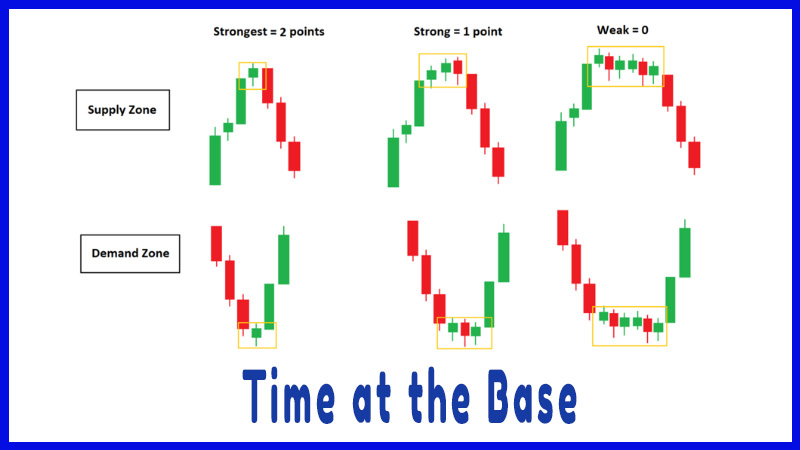
The zone
is fresh, price did not test it (3 points) and price spent as little as one
candle at the base (2 points). Finally, the zone has enough room to give us a
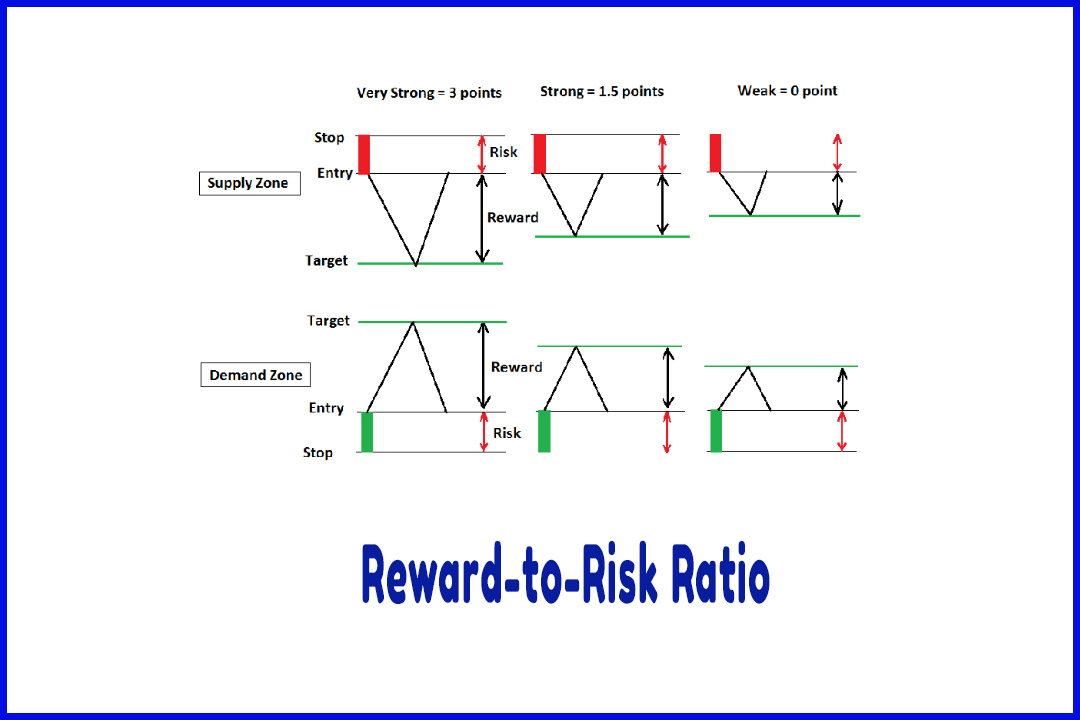
3:1 ratio (3 points).
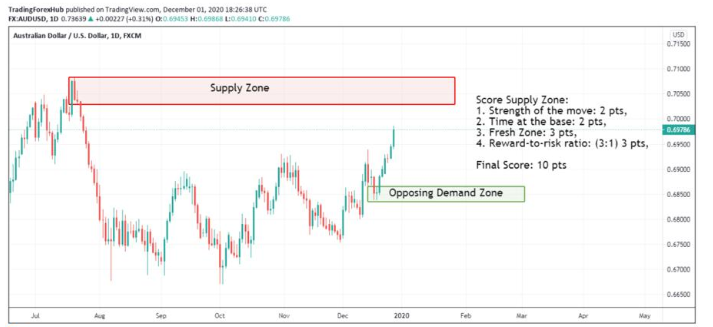
The final
score is 10 points and with this score, we have to place a limit order at the
proximal line of the supply zone and wait for the price to continue moving
higher to trigger our pending order.
This is a
good example of the perfect trade.
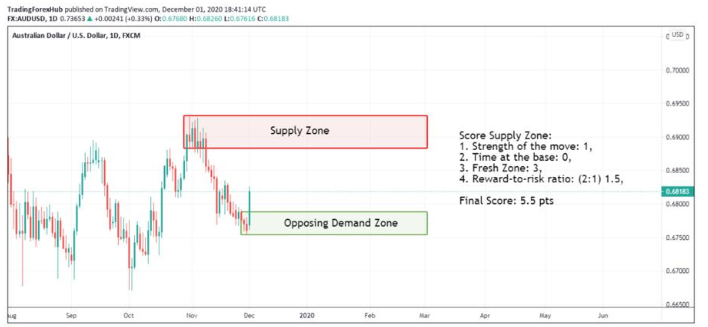
The next
example shows a supply zone with a final score of 5.5 points. In this example,
the supply zone is fresh (3 points) but has 6 candles which makes it a weak
zone to trade (0 point).
Next, we
have a weak move out of the zone because of the two ERCs we give it 1 point.
The reward-to-risk ratio is 2:1 scoring 1.5 points.
The final
score is 5.5 points which is a good example of a bad zone to trade. This supply
zone is considered a low probability zone based on our final score.
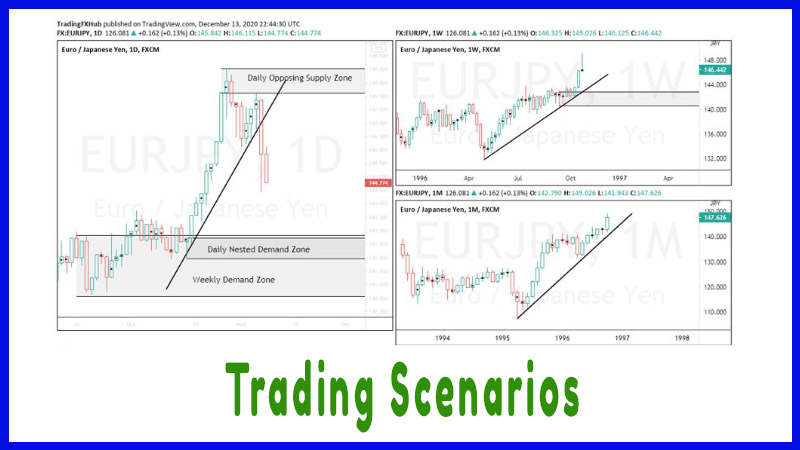
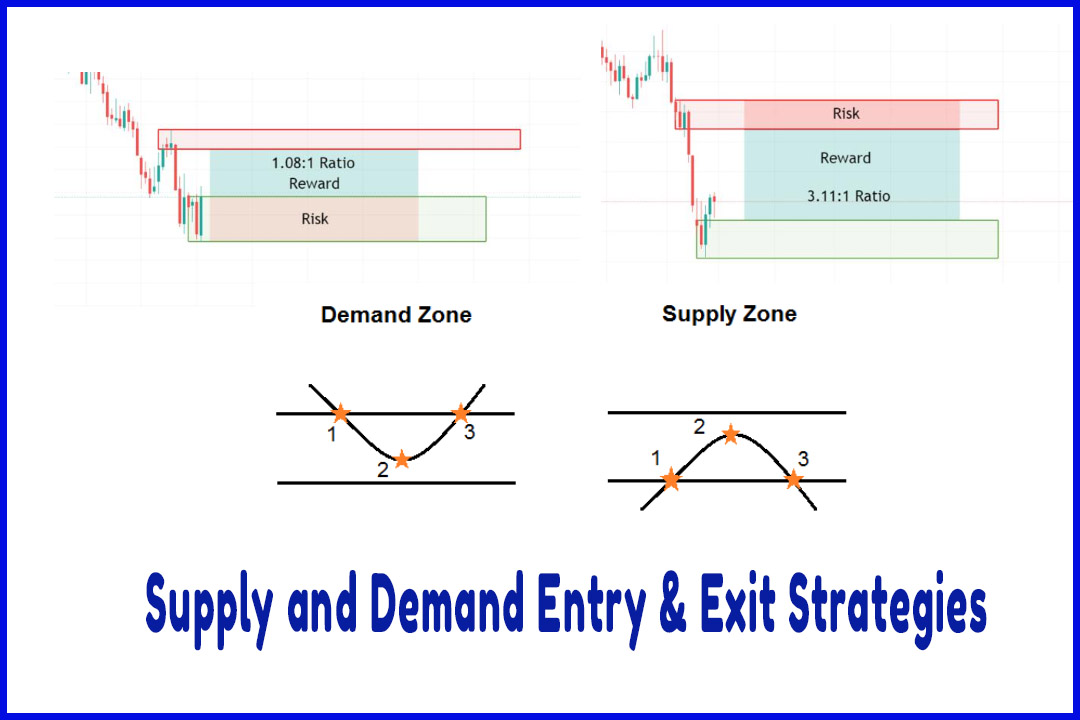
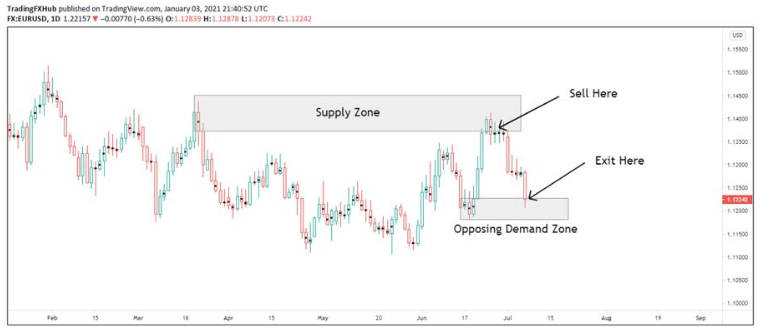
Exit Strategies
To close
open positions, we could either use an opposing zone or a fixed pip ratio.
-
Opposing Zone: we sell at the supply zone and we exit as soon as the price
reaches the first opposing demand zone.
We can
also close half the position size at the first opposing zone and close the
second half when the price reaches the second opposing zone further down.
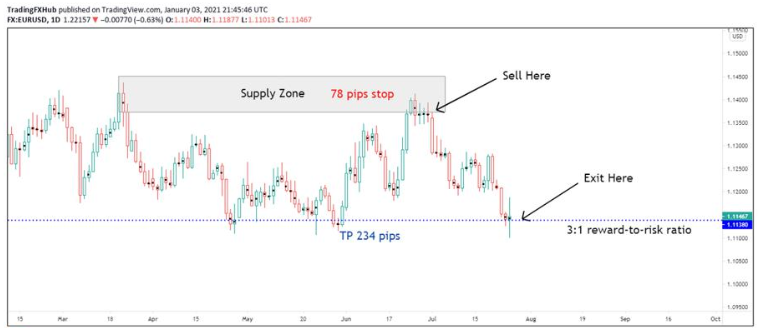
-
Fixed pip ratio: we use the stop loss to calculate the exit of our trade. For
example, if we use a 3:1 reward-to-risk ratio, we multiple the stop loss by 3
to get our exit.
In this
example, we sell at the supply zone with a 78 pips stop. The exit level is 234
pips away from our entry.
Easy Way To Learn Supply & Demand Trading Strategy : Supply and Demand Trading Strategy : Tag: Supply and Demand Trading, Forex : Trade Exit Strategies, Confirmation Order, Market Order, Limit Order, Entry Strategies - Supply and Demand Entry & Exit Strategies